Running adorn
Once you have met all prerequisites, you are ready to adorn your GitHub repository.
This article explains how to create a static website for your GitHub
repository. If your GitHub username is johndoe123 and you have a repository
called my-tool, you can create the website
https://johndoe123.github.io/my-tool. If your GitHub organization is
wemakethings and you have a repository called ourthing, you can create the
website https://wemakethings.github.io/ourthing.
If you instead wish to create a repository for your GitHub account itself, click here instead.
Run Turbopelican
You can run the following command:
cd path/to/my-repo
uvx turbopelican adorn
You will be prompted for a number of settings.
$ uvx turbopelican adorn
Who is the website author? [John Doe]
What is the name of the website? [my-repo]
What timezone will your website use? [Australia/Sydney]
What language will your website use? [en]
What is your website URL? [https://johndoe123.github.io/my-repo]
Of course, the defaults will depend on your system. In general, you can choose a website author and website name arbitrarily. If the default timezone is not correct, and you are not sure what timezone to use, you can check on Wikipedia in the column "TZ identifier" for a list of acceptable timezones. Likewise for the language, if the default is incorrect and you are not sure what language code, check on Wikipedia for a list of ISO 639 compliant language codes.
The most important setting is the website URL, and this will depend on your
GitHub user/organization name. If your GitHub account is called john-doe and
your repository is called mycoolproject, then you should input
https://john-doe.github.io/mycoolproject as your URL.
Once you have provided answers to the questions, Turbopelican will "adorn" your repository with the components necessary for the publication of a static website. Check the changes are to your liking then make a commit.
git add .
git commit -m "Create Turbopelican site."
At present, your changes will only deploy from the main branch, so deploying
will not work unless they are committed on that branch.
Push code to GitHub
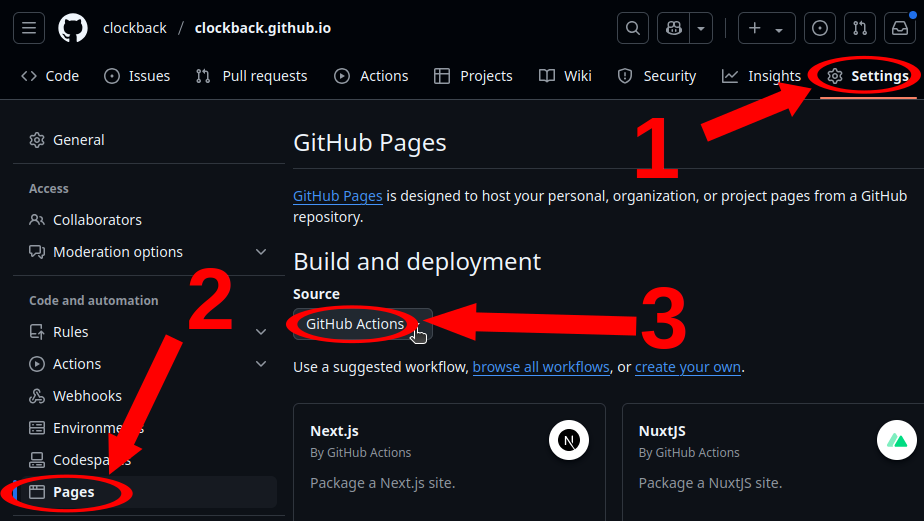
Before you push your changes to GitHub, you will need to make sure that your GitHub repository is correctly configured to deploy your website. Enter the settings for your repository and under "Code and automation" click "Pages". The section "Build and deployment" allows you to choose a source. Choose "GitHub actions".
Now you can push your changes.
View your website
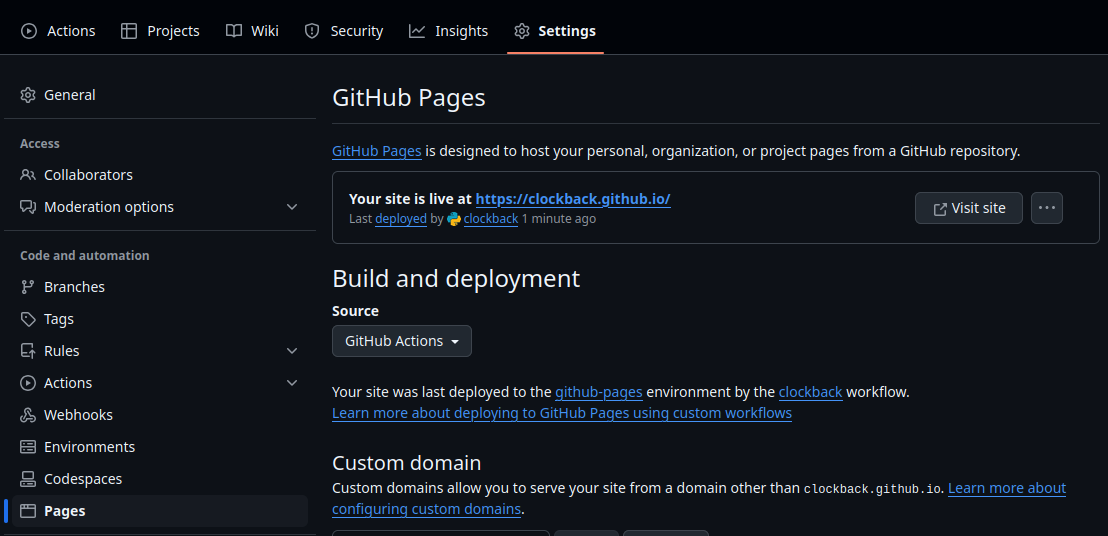
Refresh the page with your GitHub repository settings, and you should be able to see (it may take a short period of time) that your website has been deployed.
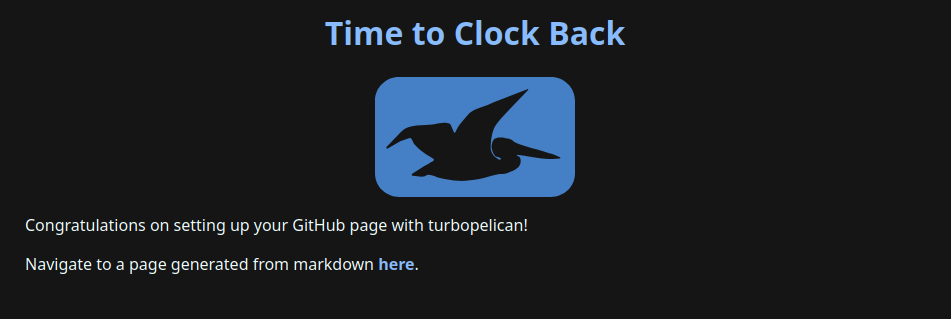
Follow the link (this URL be the same as your site URL you defined earlier) and you should see your new website:
Whenever you push changes from your local Git repository to GitHub, this website will update. Learn more about how to modify your website here.